7 Minikube Tips
I love my Arch Linux, which I’ve been using it for years, more than I care to count. But sometimes I believe that all of us Linux users, deep in our heart of hearts, have some Windows- or Mac-only software that we covet.
For me, that software is Docker Desktop; not much for the sake of Docker, but mainly for the standalone Kubernetes cluster.
I’m afraid I can’t give you Docker Desktop for Linux, but I’ll offer the next best thing instead:
7 tips to get the most out of Minikube
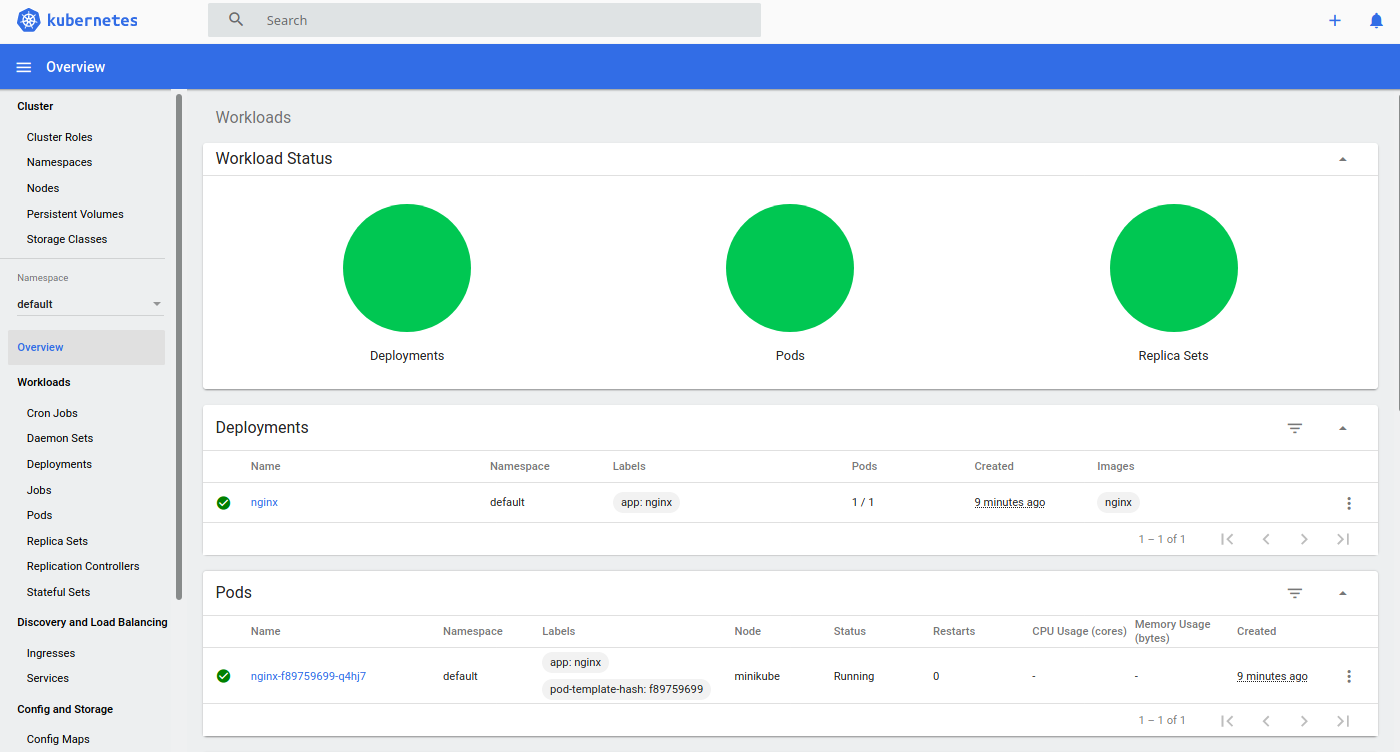
Use the Dashboard
This is one of the best features for me. Type minikube dashboard, which starts the Web UI that lets you manage all your Kubernetes resources. You can even start a terminal in a pod for a quick debug.

Periodically Reset Minikube
Every now and then, delete the cluster with minikube delete and start a new one with minikube start. I’ve been bitten by strange networking problems in the past and they all cleared up everytime after resetting the cluster.
SSH to the VM
Minikube runs a single-node Kubernetes on your laptop. Sometimes we need to log in to the VM to get a closer look. The problem is that it runs in headless mode, so we don’t have a terminal window. But Minikube has a built-in ssh command for this: minikube ssh
File Sync
If you put a file in $HOME/.minikube/files it will automatically be copied into the VM when you start the cluster.
For instance you can override the DNS servers in the VM like this:
$ mkdir -p ~/.minikube/files/etc
$ echo nameserver 1.1.1.1 > ~/.minikube/files/etc/resolv.conf
$ minikube start
Automount $HOME
Did you know that if you start Minikube with minikube start --mount it automatically mounts $HOME in the VM? On my machine, home gets mapped to /minikube-host (which is different that documented path).
You can also mount any directory in the VM with:
$ minikube mount /path/on/host:/path/on/vm &
Try Different Versions
It’s a good idea to always use the same Kubernetes version that you have in production. You can change the local version with --kubernetes-version. For example:
$ minikube start --kubernetes-version="v1.18.5"
Connect with Tunnel
You may have noticed this when you deploy a load balancer service:
$ kubectl get service
NAME         TYPE           CLUSTER-IP     EXTERNAL-IP    PORT(S)        AGE
my-service   LoadBalancer   10.97.97.121   <pending>      80:32446/TCP   88s
It never gets assigned an external IP.
At first, I didn’t pay much attention to that, I just went with the links provided minikube service --url SERVICE_NAME.
But see what happens when you start a tunnel (do this on a second terminal)
$ minikube tunnel
Now suddenly the LoadBalancer service has an IP:
$ kubectl get service
NAME         TYPE           CLUSTER-IP     EXTERNAL-IP    PORT(S)        AGE
my-service   LoadBalancer   10.97.97.121   10.97.97.121   80:32446/TCP   88s
And it should be connectable:
$ curl 10.97.97.121:80
I’m glad we have Minikube; it’s an excellent way to try out and develop Kubernetes applications. I hope these tips helped you get the most out of it.
-Tomas 👋